Hey guys, so you’re running a dewatering centrifuge, right? Or maybe you’re the maintenance person stuck with figuring out why your machine’s been acting wonky lately—maybe it’s not dewatering as good as it used to, or it’s making weird grinding noises that weren’t there before. Trust me, I’ve been in your shoes. I’m with a dewatering centrifuge supply company, and I’ve talked to way too many operators who skip proper cleaning steps until their machine basically dies on them mid-shift. That’s why I’m writing this today—no fancy jargon, just real, actionable steps you can follow to keep your centrifuge running like a champ, and yeah, I’ll wrap it up with how you can hit us up if you need help with your specific model or parts. Dewatering Centrifuge
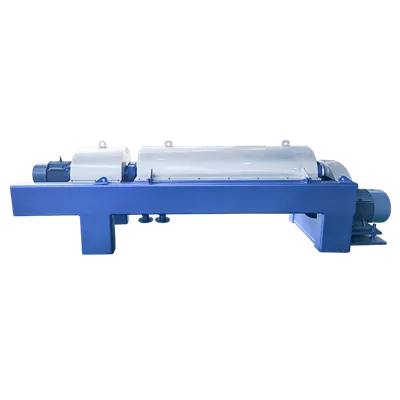
First off, let’s get one thing straight: cleaning a dewatering centrifuge isn’t just “wipe the outside and call it a day.” This machine spins at insane speeds—we’re talking thousands of RPMs usually—so even a tiny bit of caked-on sludge or debris can throw off the balance, which leads to way bigger problems. I’ve seen operators skip deep cleaning for months, only to have the bowl crack because the uneven weight wore it down, or the motor burn out from working extra hard to overcome that sludge buildup. So let’s break this down step by step, starting with pre-cleaning prep because rushing this part is how you get hurt or damage your machine.
Before you even touch any tools, you need to shut everything down properly. I know, it’s tempting to just hit the emergency stop button and jump in, but wait—let the centrifuge come to a full, complete stop on its own. If you force it to stop early or yank the power, you risk damaging the rotor bearings, and that’s a $$$ fix you don’t want. Also, unplug the main power cord and lock out/tag out (LOTO) the machine, just like OSHA tells you. Don’t skip this—we had a client a while back where someone accidentally bumped the power switch while cleaning, and that was a nightmare. Pro tip: label the lockout tag clearly so no one else tries to turn it on while you’re working.
Next, take off all the removable parts. Every centrifuge’s gonna have slightly different pieces, but generally, you’ve got the rotor (the spinning bowl), the skimmer blades, the feed chamber, and the discharge ports. These are the spots where debris loves to hide—especially fine solids like sludge, food waste, or whatever you’re dewatering. Don’t force anything; check your manual first, but most parts just twist or pull off easily once you loosen the clips. If something’s stuck, don’t use a metal screwdriver to pry it—you’ll scratch the surface, and scratches can catch debris later and cause buildup. Use a soft plastic spatula or a non-abrasive plastic scraper instead.
Now, the actual cleaning part. Let’s start with the removable parts first because that’s the easy stuff. I usually take a bucket of warm water with a mild, pH-neutral detergent—avoid harsh chemicals like bleach or acidic cleaners, right? Those can eat away at the centrifuge’s stainless steel over time, which leads to rust or pitting. Scrub each part gently with a soft brush, like a nylon dish brush or a dedicated industrial centrifuge brush. Pay extra attention to the crevices, the edges of the skimmer blades, and the inside of the discharge ports—those nooks are where 90% of the gunk hides. If there’s really caked-on sludge, let the part soak in the warm soapy water for 10 or 15 minutes first. That softens the gunk so you don’t have to scrub super hard.
Now for the main event: the rotor bowl. This is the heart of the centrifuge, so you can’t mess this up. First, empty any leftover material—pour it out into a waste bin, don’t just let it sit in the bowl. Then, spray the inside with a low-pressure stream of warm water (high pressure can etch the steel too, trust me) to loosen surface debris. Then, use that same mild detergent and soft brush to scrub the inside, making sure you get all the way to the top and bottom. Wait, if your centrifuge processes especially sticky stuff—like food pulp or industrial sludge—you might need a slightly stronger solution, but still stick to stainless steel-safe cleaners. Never use abrasive pads or steel wool on the rotor, that’s a fast way to ruin it.
Oh, and don’t forget the hard-to-reach spots! The feed line that goes into the rotor, the seal areas around the rotor and the body, and the outlet pipes. A lot of people miss these, and then they wonder why their centrifuge’s dewatering rate drops. Those areas get clogged with fine particles that don’t spin out during normal operation, so they build up over time. Use a small bottle brush or even a pipe cleaner (for tiny lines) to get those clean. For the seals, be extra gentle—if you damage the rubber or plastic seals, you’ll get leaks during operation, which means less efficient dewatering.
Once everything is scrubbed and rinsed, it’s time to dry all the parts. I can’t stress this enough—moisture left on the stainless steel will cause rust, especially if you’re storing the parts for a while, or if your centrifuge is used in a damp environment. Use a microfiber cloth or lint-free towel to dry every part thoroughly. For the rotor, you can also let it air dry upside down for an hour or two to make sure all the water drains out, but don’t leave it sitting too long—dust can get in and cause buildup later.
Wait, let’s talk about regular maintenance checks while you’re cleaning, okay? This is the perfect time to spot small issues before they become big ones. While you have the rotor off, inspect the inside for any scratches, dents, or pitting. If you see a small scratch, it’s not a big deal, but if it’s deep, you might need to get it polished or replaced—those scratches catch debris and throw off balance. Also, check the seals and gaskets for cracks or tears. If a seal is damaged, replacing it during your cleaning session is way cheaper than letting it leak and damage your motor or other parts. And don’t forget to check the bolts and clips that hold the parts together—tighten any loose ones, because loose parts can vibrate and cause wear over time.
Now, reassembly time. Make sure every part is completely dry before you put it back together. Align the rotor correctly—check your manual for the right position, because if you put it on crooked, it’ll be unbalanced. Tighten the clips and bolts to the right torque, don’t over-tighten them or you’ll strip the threads or warp the rotor. Once everything is put back, do a test run. Turn the centrifuge on at low speed first, let it run for a minute, and listen for any weird noises or vibrations. If it runs smooth, then you can crank it up to normal speed. If you notice any shaking, turn it off immediately—you probably didn’t align the rotor right, so double-check that.
Wait, how often should you do this? That’s a common question. It depends on what you’re dewatering, and how much you’re running the centrifuge. If you’re using it 24/7 processing heavy sludge, you should do a deep clean after every shift, or at least every 8 hours. If it’s running a few times a week with less sticky material, you can do a deep clean weekly, with a quick wipe down after each use. Also, if you notice a drop in performance—like solids coming through in the effluent, or the motor running hotter than usual—that’s your sign to clean it, even if it’s not your scheduled time.
Let me throw in a few pro tips from our service team, okay? We’ve been working with dewatering centrifuges for years, so we’ve got a few tricks up our sleeve. First, if you have really stubborn, oily residue (like from industrial waste), you can use a small amount of food-grade degreaser, but make sure you rinse it really well—leftover degreaser can contaminate your product if you’re processing food or pharmaceuticals. Second, never use high-pressure washers, even if you think it’ll save time. High pressure can force water into the motor or electrical components, which will short them out. We’ve seen way too many motors get fried because of that. Third, keep a cleaning kit handy—stock it with the soft brushes, non-abrasive scrapers, pH-neutral detergent, and lint-free cloths so you don’t have to run around looking for stuff mid-clean.
Now, let’s talk about common mistakes we see operators make. Number one: skipping the lockout/tagout. We can’t stress that enough—one second of carelessness can cause serious injury. Number two: using harsh chemicals or abrasive tools. Like I said earlier, that ruins the stainless steel and leads to long-term damage. Number three: not drying parts properly, leading to rust. Number four: not checking for small issues during cleaning, so a tiny scratch turns into a cracked rotor a few months later.
If you’re still here, you’re probably serious about keeping your dewatering centrifuge running well, which is exactly what we’re all about. We supply these machines to all kinds of industries—food processing, wastewater treatment, mining, you name it—and we’ve worked with clients who thought their centrifuge was done for, just because they skipped proper cleaning. If you’re dealing with a machine that’s not performing like it should, or you need help with parts, manuals, or just have questions about your specific model, hit us up to connect and chat about it. We’re not here to push a sale on you right away—we’re here to help you keep your equipment running smoothly, because that’s what matters most to you.
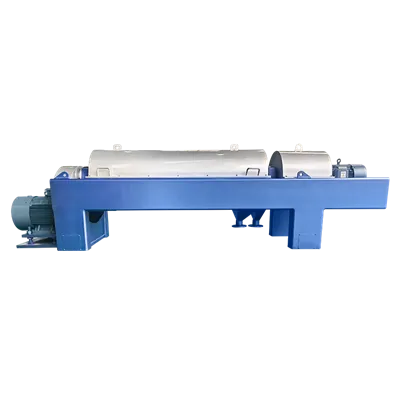
Wait, let me wrap this up quick before I forget. Cleaning your dewatering centrifuge doesn’t have to be a huge chore, but it does need to be done right. Take your time, follow the steps, don’t cut corners on safety or proper cleaning products, and do those quick checks while you’re at it. Your centrifuge will thank you with longer life, better performance, and fewer breakdowns. And if you ever need a hand—whether you’re looking for a new centrifuge, replacement parts, or just want to ask a few questions about maintaining the one you have—we’re here to talk. Don’t hesitate to reach out.
2 Phase Decanter Centrifuge References:
- OSHA Standard 1910.147, The Control of Hazardous Energy (Lockout/Tagout)
- GEOLAND International, “Proper Maintenance of Solid Bowl Decanter Centrifuges,” Industrial Maintenance Journal, 2021
- American Society of Mechanical Engineers (ASME), “Guidelines for Cleaning and Maintenance of Stainless Steel Process Equipment,” 2019
- European Hygienic Engineering & Design Group (EHEDG), “Cleaning Protocols for Industrial Separation Equipment,” 2020
Lishui Yuanrong Environmental Protection Equipment Co., Ltd.
As one of the most professional dewatering centrifuge manufacturers and suppliers in China, we have world-leading production equipment and strong manufacturing capabilities. Please feel free to buy customized dewatering centrifuge from our factory. Also, quotation is available.
Address: Lot 6-1, Block 15, Wanyang Zongchuang City, Lishui, Zhejiang, China
E-mail: 361184920@qq.com
WebSite: https://www.yrhdc.com/
